Chef's
plat du jour
This is a secret page for clients only. I'd like to offer you my tips and tricks as a way to say thank you for your business & support.
Welcome!
If you've made it here, you're getting a sneak peek into the "back-of-house" secrets. This is where I share recipes, recommendations, and my latest food obsessions.
Reach out if you'd like me to post about anything specific. If you can't stop craving something I've served you in the past, I'm happy to help satisfy your taste buds by sharing my secret sauce.
January 2026
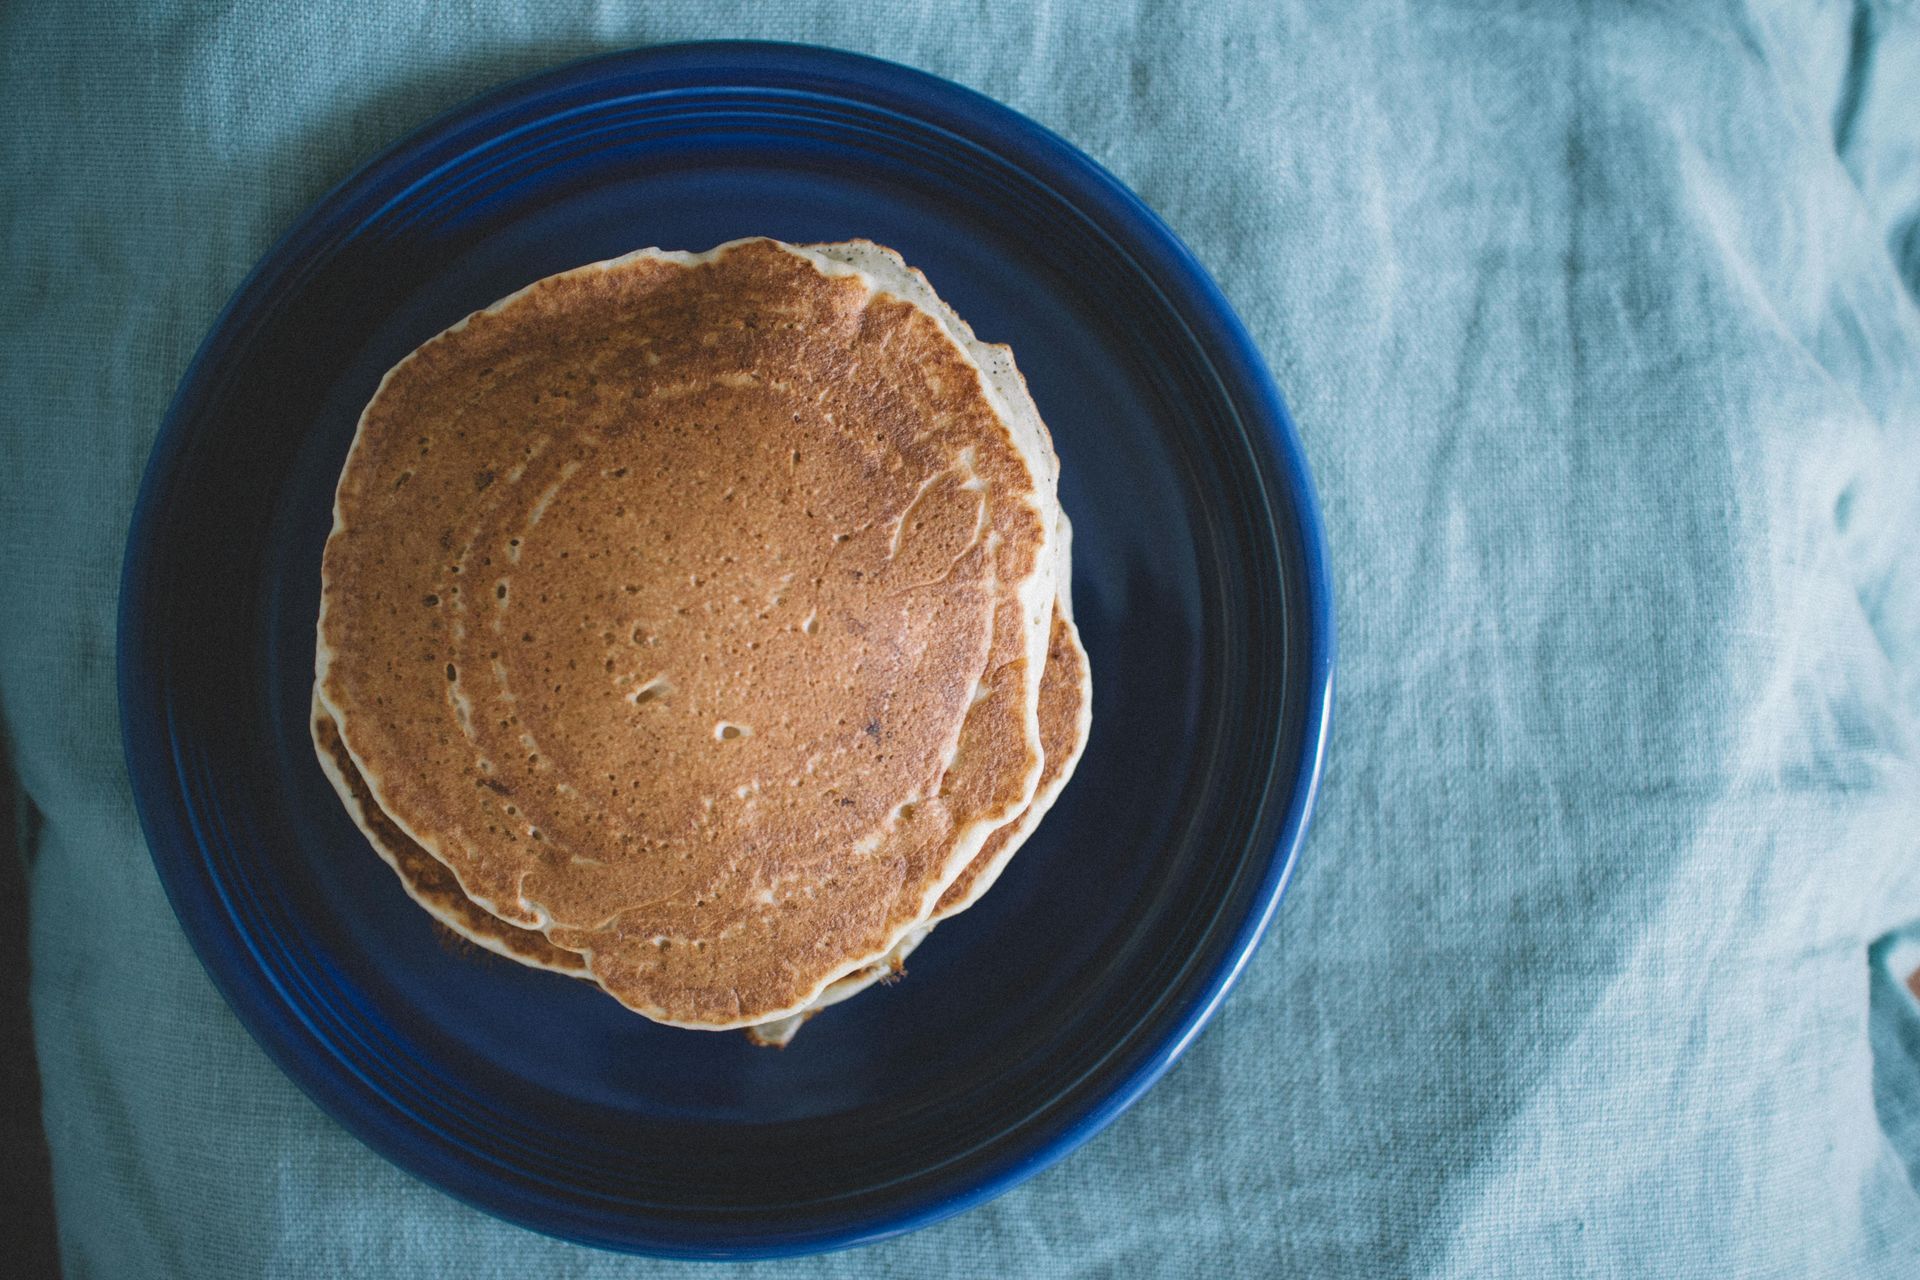
Anything Pancakes
In between all the events I get to cook for my clients, my newest task is learning how to optimally feed a tiny human and keep food exciting for all around. This recipe works great to keep everyone happy — it's versatile and even freezes well. I make it about once a week and constantly change what is going into it. It's quick, easy, quite forgiving and always delicious.
Ingredients
2 Cups Flour (250 g)
2 Tbsp Sugar
3/4 Tsp Salt
2 Tsp Baking Powder
1/2 Tsp Baking Soda
Cinnamon - some generous dashes
1 3/4 Cup Milk or Buttermilk
2 Eggs
4 Tbsp Butter
Easy optional add ins: 1 mashed banana, 1/4 cup Pumpkin Puree, 1-2 Tbsp Nut Butters, 1 Grated Apple, Berries scattered into batter last second
Procedure
- Mix dry ingredients in a medium size bowl
- Mix wet ingredients in another bowl (mix in optional add ins here - except for berries)
- Add wet ingredients to dry ingredients
- Mix just until flour pockets disappear, you don't want to overmix. If it's too loose I sprinkle more flour; if it's too dry I add some more milk
- Heat a griddle or cast iron pan to low-medium for 10 min
- Add some butter to the coat pan
- Pour in about 2 oz of batter to pan per pancake
- Gently flip once you see bubbles popping in the center of the pancake
- To keep them warm until all are done, I warm the oven to 200 and put my plates in there, then put the pancakes right into the oven.
- Serve with butter and maybe some real maple syrup
*Chef's Tips:
- Personal preference, we omit salt and sugar (while my son is very young)
- Flour: I usually add in some whole wheat or rye flour
- Milk: Alternative milks work perfectly well and I usually add some yogurt to mine
- Freeze extras: let cool completely in a single layer, then flip once so they don't stick and put into the freezer, store for a few weeks tightly sealed. Reheat until warm in a 400F oven
ENJOY!
April 2024
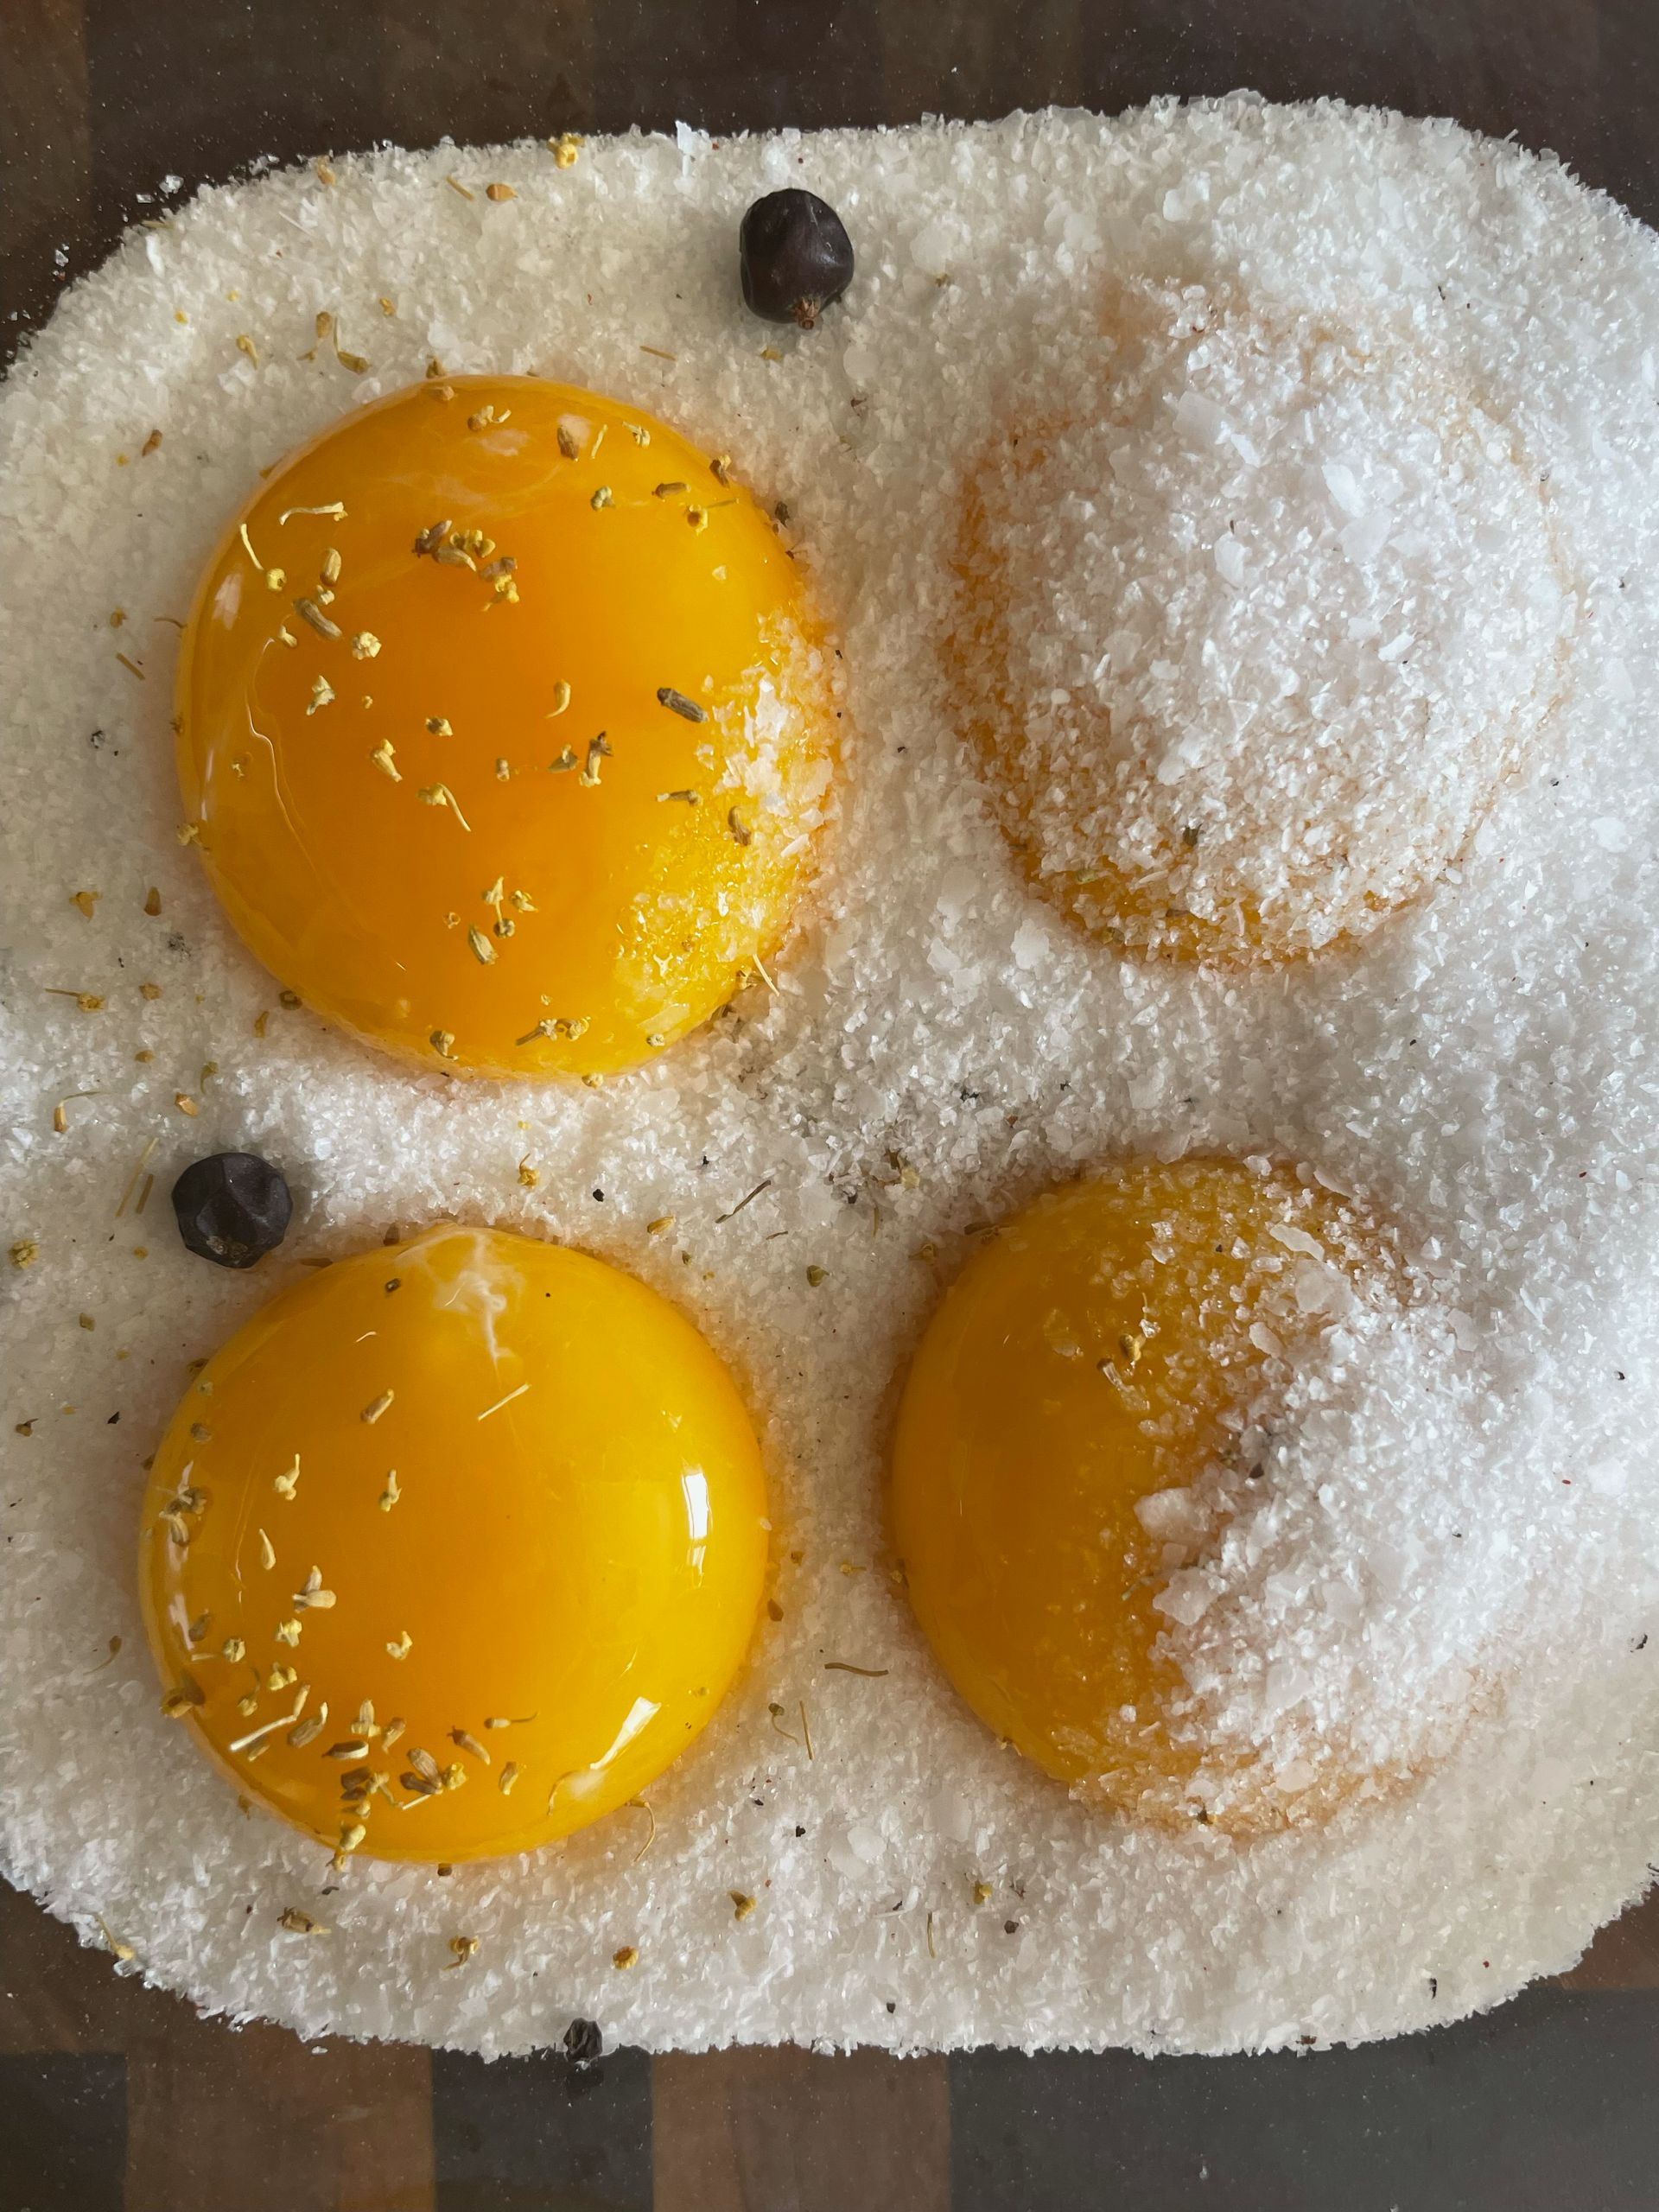
Cured Egg Yolks
a delicious garnish
I'm sharing one of my favorite recipes to garnish any preparation of Asparagus. A classic play on Asparagus with Hollandaise Sauce is to deconstruct the dish and make it a bit easier to execute. This is not to say it doesn't require patience, but the wait will be worth it.
My favorite ways to prepare asparagus is either by grilling, charring in a cast iron pan over medium-high heat or steaming and shocking in an ice bath. I also love a splash of fresh squeezed lemon over my cooked asparagus. All of these methods can get garnished with cured egg yolk. Simply grate the yolk over the finished asparagus dish with a zester, like you would with a block of Parm. The yolk adds sweet, savory, herbal and umami notes which some describe as “cheesy”, adding a perfect compliment for this springtime treat. With a bit of time and knowhow, we can transform everyday ingredients to something extraordinary.
Ingredients
4 Egg Yolks
2 Cups Salt
1.5 Cups White Sugar
Fennel Pollen (or black pepper)
Procedure
- Mix salt and sugar together in a small bowl
- In a shallow dish (with walls tall enough to wrap with plastic wrap without touching the contents of the dish) fill with half of the salt/sugar mixture.
- Using a whole egg, make 4 small indentations in the salt/sugar mix to create a landing pad for the yolks leaving two inches between each one
- Separate the whites from the yolks and gently drop each yolk into an indentation in the salt/sugar mix. Save the whites for another project.
- Sprinkle a small amount of fennel pollen (or fresh cracked black pepper) over each egg yolk and cover with the remaining salt/sugar mix. The yolks should be submerged in the salt/sugar mix.
- Wrap tightly in plastic wrap and put in the fridge for 7-10 days.
- After about 10 days curing in the fridge, the yolks will become firmer as the liquid is drawn out.
- Once firm enough to pick up and not feel sticky, they are ready for dehydration.
- Give the cured yolks a quick rinse under cold water and pat them dry with a paper towel.
- At this point, they can be placed in a dehydrator set to 160F for about 1 hour. You can use an oven on the lowest setting if you keep an eye on it, making sure it doesn't burn or sweat.
- After they cool, cured egg yolks can be kept in a sealed container in the fridge for a couple weeks.
Happy Cooking!
December 2023
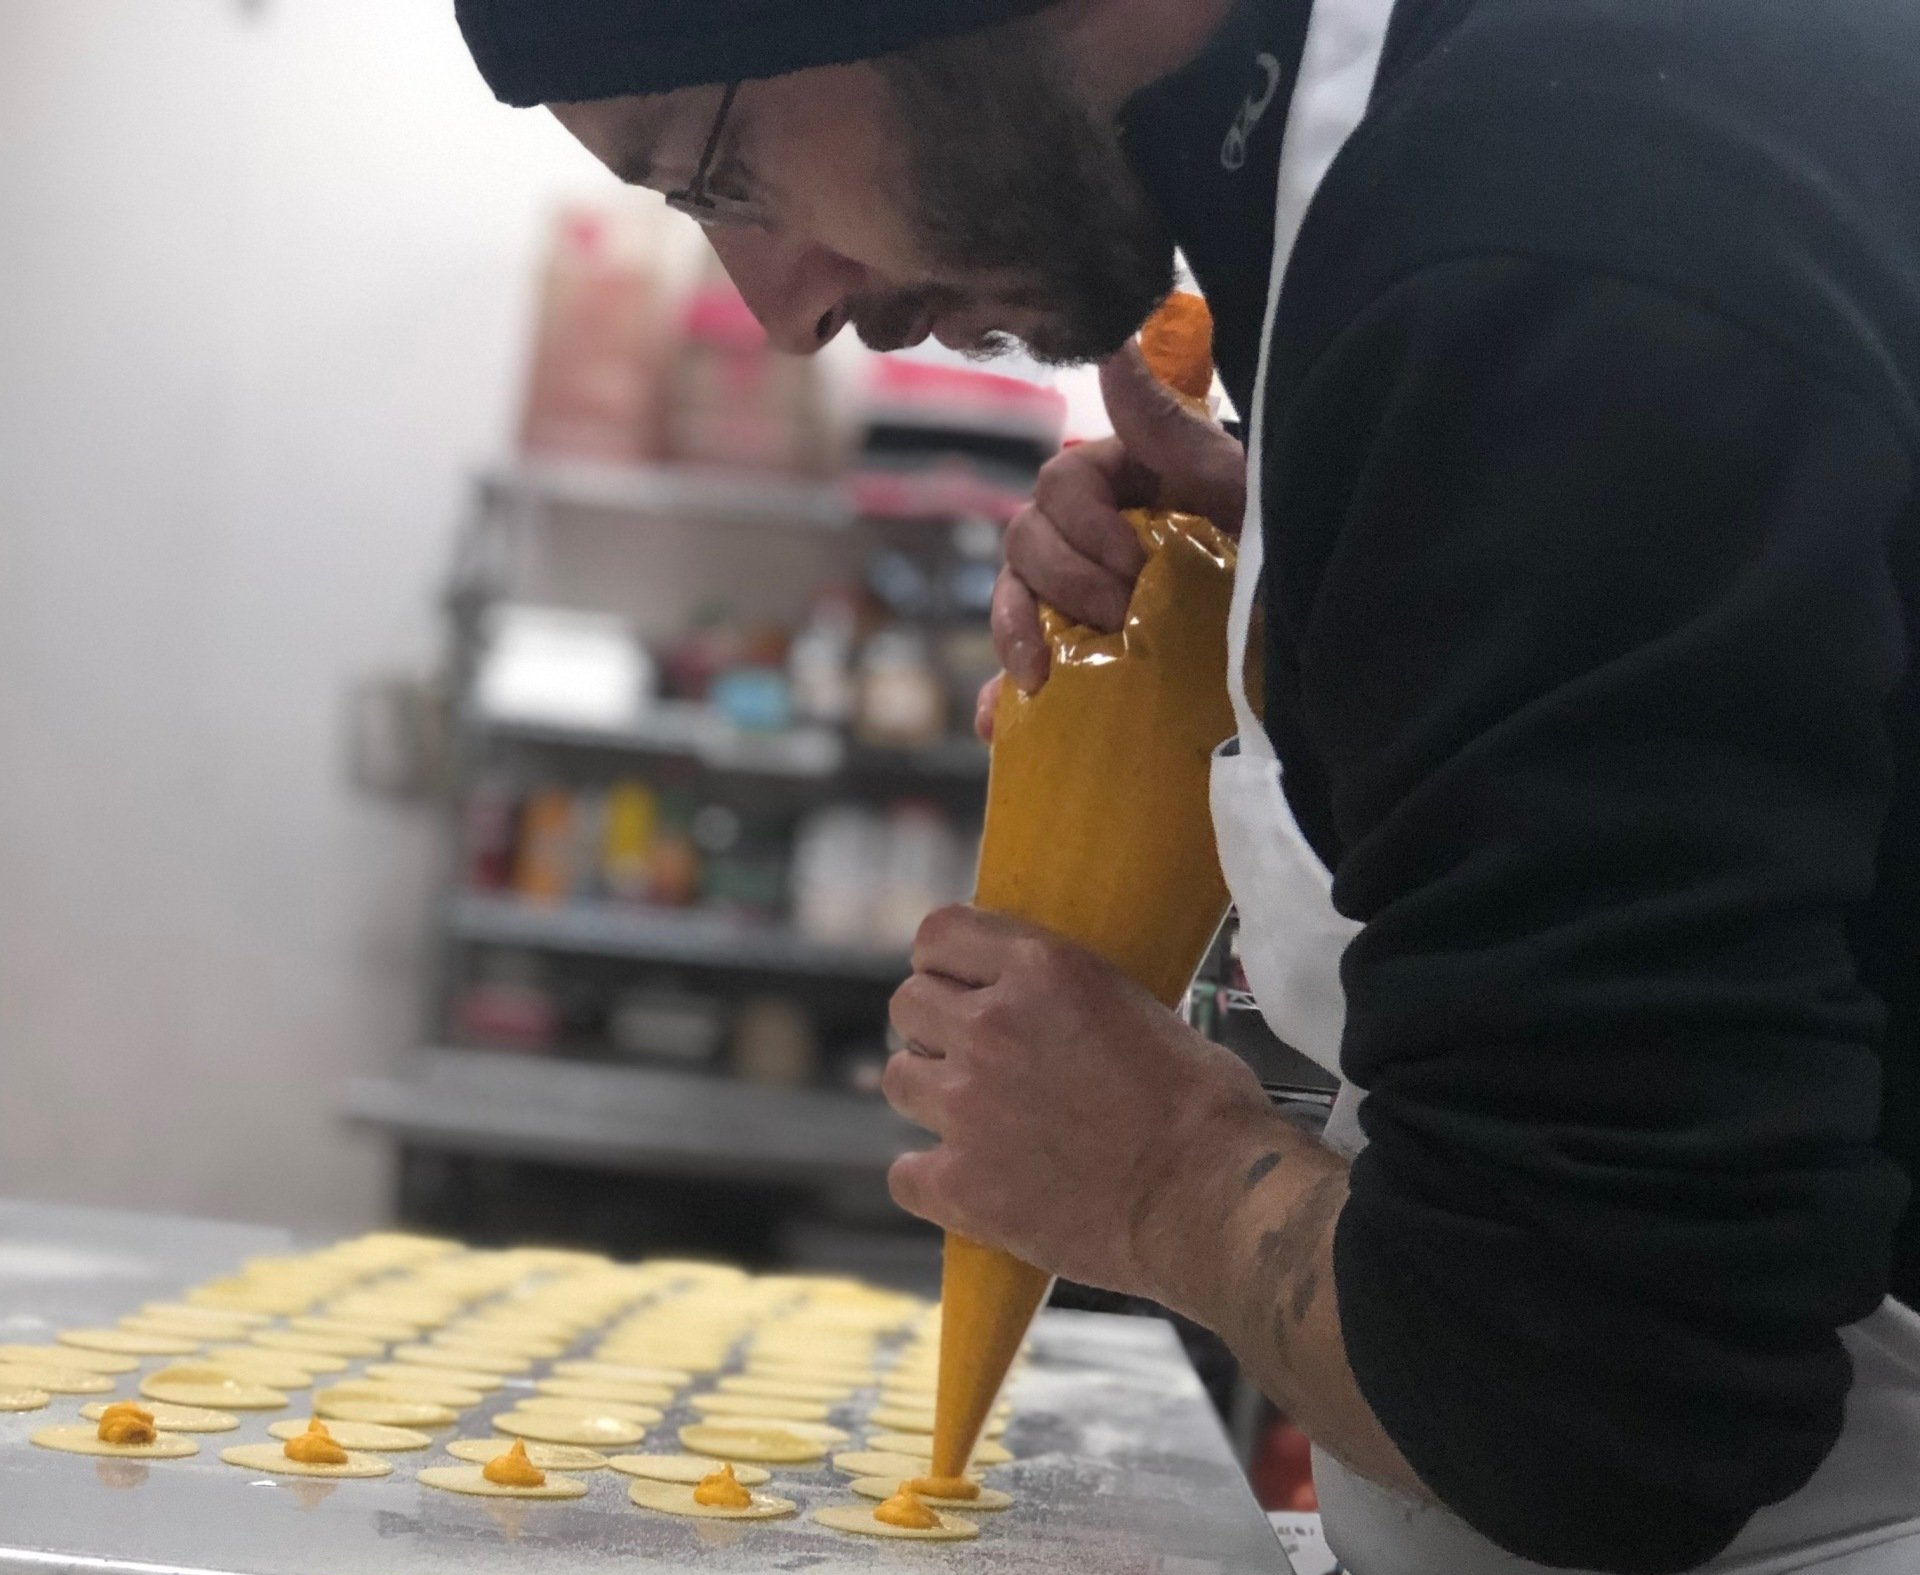
Meyer Lemon Pizzelle
a classic Italian holiday cookie
I am incredibly grateful for the opportunity to have cooked for you in 2023, and I am so excited to cook for you again in 2024. Simply put - Grazie Mille!! As my way of saying "a thousand thanks" to you, here is a classic Italian holiday cookie recipe that is always a crowd pleaser and easy to cook at home.
*Special equipment needed - an Italian waffle iron for Pizzelle.

Ingredients
3 Eggs
2 tsp Lemon Extract
2 Meyer Lemons for zest
1 Cup of Sugar
4 oz Unsalted Butter, Melted then Cooled
2 Cups AP Flour
1.5 tsp Baking Powder
Procedure
- In an electric mixer, beat the eggs and sugar with a paddle. Add extract, zest and butter.
- On low speed, gradually add the flour and baking powder to make a sticky dough.
- Preheat pizzelle iron, which is usually just turn it on for 10 minutes.
- Drop about 2-3 tsp worth of batter on each side, just slightly behind center and close the lid.
- All irons are different, but cook for about 30-40 seconds OR the Italians say two "Hail Marys".
- Remove promptly and carefully with a fork and put onto a wire rack. You can also shape them by placing them in a muffin tin or on the back of a rolling pin.
- Dust with powdered sugar after cooled.
- Eat alone or with coffee, garnish a scoop of gelato or fill the shaped ones with whipped cream and fresh fruit.
Happy New Year & Happy Cooking!
July 2023
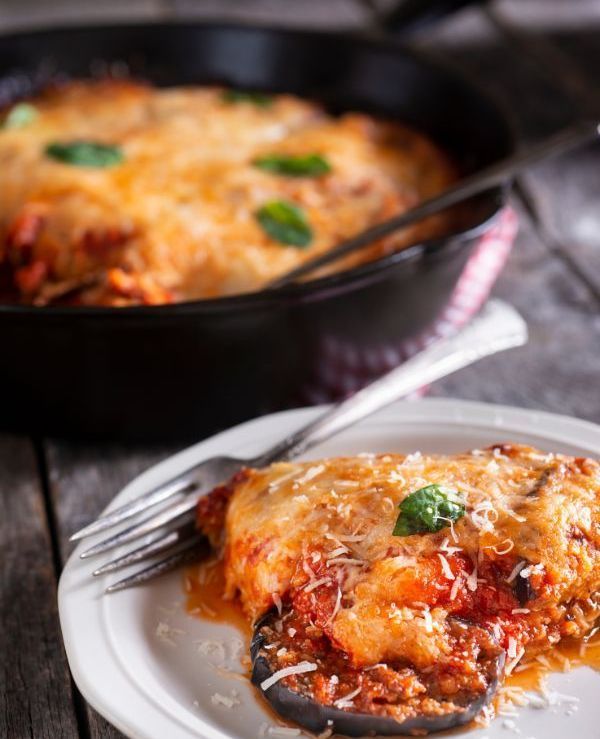
Eggplant Parmigiana
(Serves 4)
This recipe is an Italian classic for a reason and is on most Italian/American menus across our country. It is so loved that, here in America, we’ve created an even more calorically dense dish – chicken parmigiana. Although this version is loved by many and still tastes good, it’s not nearly as delicious as eggplant parmigiana when cooked with proper technique.
Health focused awareness and option: With the added frying oil, breadcrumbs and cheese, there is an obvious increase in calories. A healthier option is to bake or even grill the eggplant, and I promise, it's still delicious. If you like, feel free to substitute cheese for your favorite plant based cheeses for an even healthier version.
Ingredients
1 Large or 2 medium sized Eggplants
2 Eggs, whisked with 3 Tbsp water
1 Cup All-Purpose Flour
1 Cup Panko Bread Crumbs
1 Cup prepared Tomato Sauce
4-6 oz Mozzarella Cheese
Oil for frying
Parmigiana for grating
Salt & Pepper to taste
Procedure
- Cut eggplants into rounds about 3/4-1" thick. Place on a rack over a baking tray and season both sides lightly with salt.
- Wait 1 hour and let them sweat. This will reduce the bitterness, make them a bit firmer because of water loss, and if you're frying them – they'll soak up less oil. This step is very important so do not skip it.
- After 1 hour, pat the eggplant rounds dry with paper towels.
- Dredge the eggplants in flour (shake off any excess), then in egg wash (allow any excess to drip off), and then into the panko breadcrumbs and press firmly to coat.
- Fry in batches in the oil on medium heat in a large skillet (or I use a deep cast iron pan). Eggplant likes to soak up a lot of oil, but one way to reduce that is to make sure you are frying at a hot enough temperature to quickly create a crust on the outside prior to taking in too much oil. This should take about 2-3 minutes per side.
- Once golden brown and delicious, transfer to a clean baking sheet and sprinkle lightly with salt.
- After all of the eggplant is fried, top each one with some tomato sauce, then the mozzarella and finally a "healthy" amount of grated parmigiana cheese.
- Pop under the broiler for 2-3 minutes or until the cheese is bubbly with little golden blisters.
- Serve immediately.
Chef's personal tip: It goes great with garlic charred broccoli raab and some lightly buttered angel hair spaghetti.
Enjoy & Happy Cooking!
March 2023
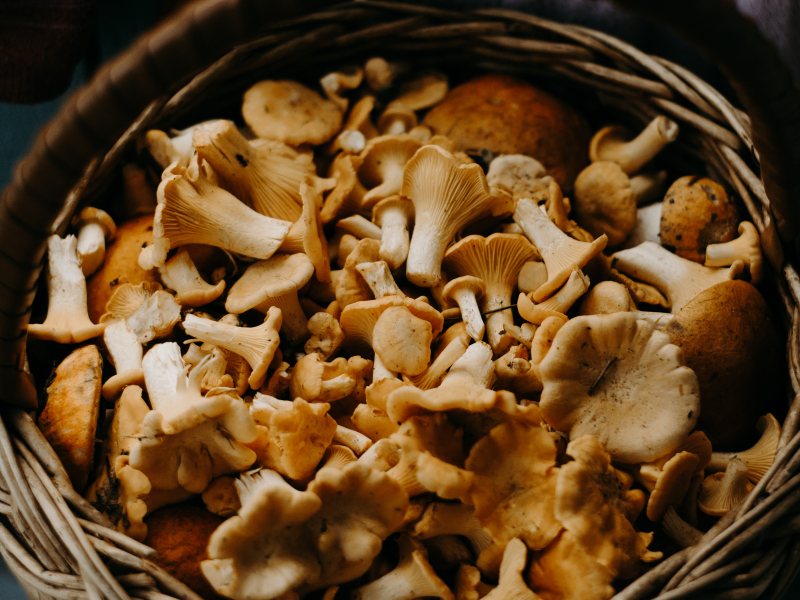
Maple Miso Mushrooms
(side dish for 4 servings)
I want to share an easy recipe with you that will get more mushrooms on your plate and will leave you craving more – let's make Maple Miso Mushrooms together!
You can use your preferred mushrooms or try something new. Some of my favorites are Maitake, Shitake, Oyster, Lion’s Mane, Cremini, and if they’re available, Chanterelle, Morel, and Hedgehogs are delightful. A few dried mushrooms, rehydrated, will totally work with some fresh mushrooms mixed in.
Miso is a nutritional powerhouse in itself, but I’ll save that for another time. It also contributes huge amounts of umami to any dish it’s added to.
A little bit of Maple Syrup and some optional chili rounds out this quick, easy, healthy and ultra delicious recipe.
Ingredients
3/4-1 lb Mushrooms, wiped clean of any dirt
1 x Shallot, peeled and sliced into rings
2 x Garlic Cloves, smashed and minced
1 Tbsp Miso Paste (I use white miso)
2 tsp Maple Syrup
2 Tbsp Cooking Oil of choice
1 Tbsp Butter or vegan butter, softened
1-2 tsp Chili Crunch (optional)
Procedure
- In a small bowl, mix miso paste, maple syrup, butter and chili crunch (if using). Set aside for later.
- After mushrooms are clean, chop or shred them into large bite size pieces, keeping in mind they will shrink as they cook. Aim for large pieces but with more surface area for browning to occur.
- In a large frying pan, at medium heat, put in your mushrooms with no oil, seasonings or anything. This is called the dry saute and it will help bring out the moisture faster allowing for better caramelization. Don’t overcrowd your pan, use two pans or work in batches.
- Once the liquid begins to release into the pan, I like to season it with salt and add a little bit of extra virgin olive oil, avocado oil or coconut oil. Saute for 3-5 min on each side to get some color on it.
- Once most of the mushrooms are browning, lower the heat to med-low and add the shallots. Stir to combine and cook for another 3 min.
- After the shallots have softened, add the garlic and cook 1-2 more minutes until aromatic but not burnt.
- Turn off the heat and add in the maple miso compound butter from earlier.
Serve as a side dish, over steamed rice, on thick sliced toast or mix it with warm farro. And if there are leftovers, they taste great in an omelet.
.
Enjoy!
November 2022
Classic Thanksgiving Turkey Brine
(14-16 lbs)
If you plan on entertaining this year and are considering roasting a turkey, let me give you an easy tip to help ensure a showstopper – don’t skip the brine! Brining not only adds moisture and flavor to the finished product, but it also makes it more tender (meat OR vegetables).
And if you don’t want to go through all this trouble, believe me, I get it. Reach out if you want help and I'd be more than happy to do the cooking for you and your loved ones!

Ingredients
1 Gal Vegetable Stock (or Water)
1 Gal Water, heavily iced
1 Cup Kosher Salt
1/2 Cup Light Brown Sugar
1 Tbsp Black Peppercorn
1 Tsp Allspice Berries
1 each Onion, diced
1 each Garlic, cut in half
1 each Orange Peel
Procedure
- Heat a small amount of the water, and dissolve the salt and sugar into it, then let it cool.
- In a large enough vessel, place your thawed turkey (innards removed) and add all other ingredients – you may or may not need the full 1 Gal of water). A large plate or something similar will help keep the turkey submerged.
- Leave turkey in brine for 18 hours and flip it once during the brining process. If you don’t have room in your fridge, you can do this in a cooler, just make sure you add enough ice to keep it very cold to prevent any food borne-illness.
- Remove from brine at least 1 hour before you plan to cook it and let it come to room temperature.
- Pat dry with paper towels and place in the roasting rack.
- You can add additional aromatics to the cavity at this point. I like to add a chopped onion, a chopped apple, some rosemary and sage and maybe a cinnamon stick.
Happy Cooking!
April 2022
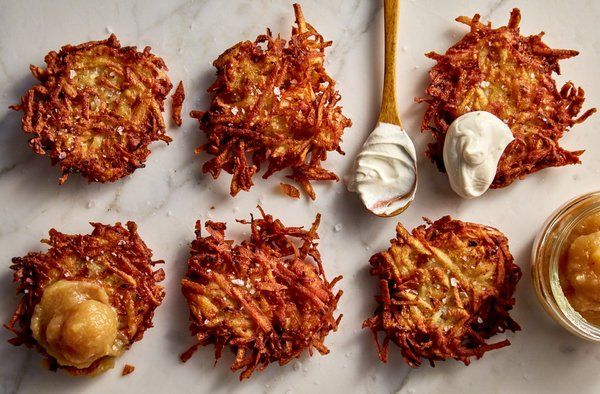
Gluten-Free Latkes
I grew up with a lot of family traditions, but one that has stuck with me over the years is cooking latkes for loved ones. Easter and Passover usually fall around the same time each year, and while many of my friends are planning egg hunts, I’m planning latkes! I hope you enjoy this indulgent recipe which also never fails to be a crowd pleaser. Of course, duck fat elevates the standard recipe, but there's also a special technique that isn't commonly known. Follow the steps below to use the potato's own starch for binding the fritter before frying to a beautiful golden brown.
Ingredients
2x Russet Potatoes, peel on preferred
1x Yellow Onion
2x Large Eggs
1/2 Tsp Baking Powder
Duck Fat (for frying)
Salt & Black Pepper to taste
Procedure
- Grate both potatoes with a box grater, or you can use the grater attachment on a food processor. Put the grated potato into a tall bowl with some cold water.
- After the potatoes are all grated, carefully remove them from the bowl of water, put them in a kitchen towel (or use your hands) and squeeze out any excess water back into the bowl. Place squeeze dried potatoes into a large bowl. Let the water sit for 5-10 min while you prepare the latke mixture.
- Grate onion into the large bowl with the potatoes. The onion juices will add great flavor. You’ll cry a little, but it will be worth it.
- Scramble 2 eggs and add a pinch of salt, black pepper and ½ tsp baking powder in a small bowl. Gently stir this into the potato/onion mixture to combine.
- By now, the potato water should have a layer of visible starch at the bottom. Carefully, pour off as much water as possible (and discard it) while reserving the potato starch at the bottom.
- Mix the potato starch in with the potato latke mixture.
- Heat a medium heavy pan, preferably cast iron, to medium heat and add 1 tbsp duck fat. Vegetable oil, canola oil, and peanut oil are all alternatives to duck fat, if you prefer.
- Drop latkes in, one at a time, using a serving spoon. Gently flatten each one into a disc shape.
- Working in batches, fry each latke for 3-5 min on each side, or until the edges are golden brown. Remove onto a paper towel lined plate or baking tray and season with salt.
- Make more than you think you’ll need, and eat them hot. A quick reheat in a 400F oven may help if you’re feeding a crowd.
- Serve with sour cream and applesauce.
.... and Enjoy!!
December 2021
Homemade Eggnog
Cheers to all of us for making it through this year. It was full of beginnings, growth, and digging deep to accomplish whatever goals were set. After many years of mental, physical and technical preparations – I started my first business in the heart of 2021. And YOU helped me lift it off the ground. So from the bottom of my heart, I thank you.
Now...on to why you are here. I'm sharing my very cheerful (and possibly dangerous) recipe for Homemade Eggnog. It requires a bit of technique and a little patience, so be sure you make it the night before you want to drink it. It's a family recipe and is known to attract elves into your life (drink with caution!). You can lower or remove the alcohol if you want, but the elves don't recommend it. ;-)

Ingredients
Large Eggs 12
Sugar 2 cups
Brandy 1 quart
Rum 1 quart
Whole Milk 1 quart
Heavy Cream 3 pints
Powdered Sugar 1 cup
Vanilla Extract to taste
Procedure
- Separate the eggs into 3 clean medium size bowls. All 12 yolks in one bowl, 6 whites in an other bowl and 6 whites in the 3rd bowl.
- Beat the 12 egg yolks with the 2 cups of sugar until pale.
- Very slowly, add in the rum and brandy.
- On low speed, beat in the milk and 2 pints of the heavy cream.
- In a separate bowl, beat the 6 egg whites until stiff. Fold the egg whites into the bowl with the alcohol egg yolk mixture.
- Beat the remaining 6 whites until stiff.
- Whip the last 1 pint heavy cream with the cup of powdered sugar. Fold the whipped cream into the egg whites.
- Gently lay this as a floater over the eggnog.
- Chill in the fridge overnight.
- Garnish with a sprinkling of cinnamon.
...and Enjoy!!